
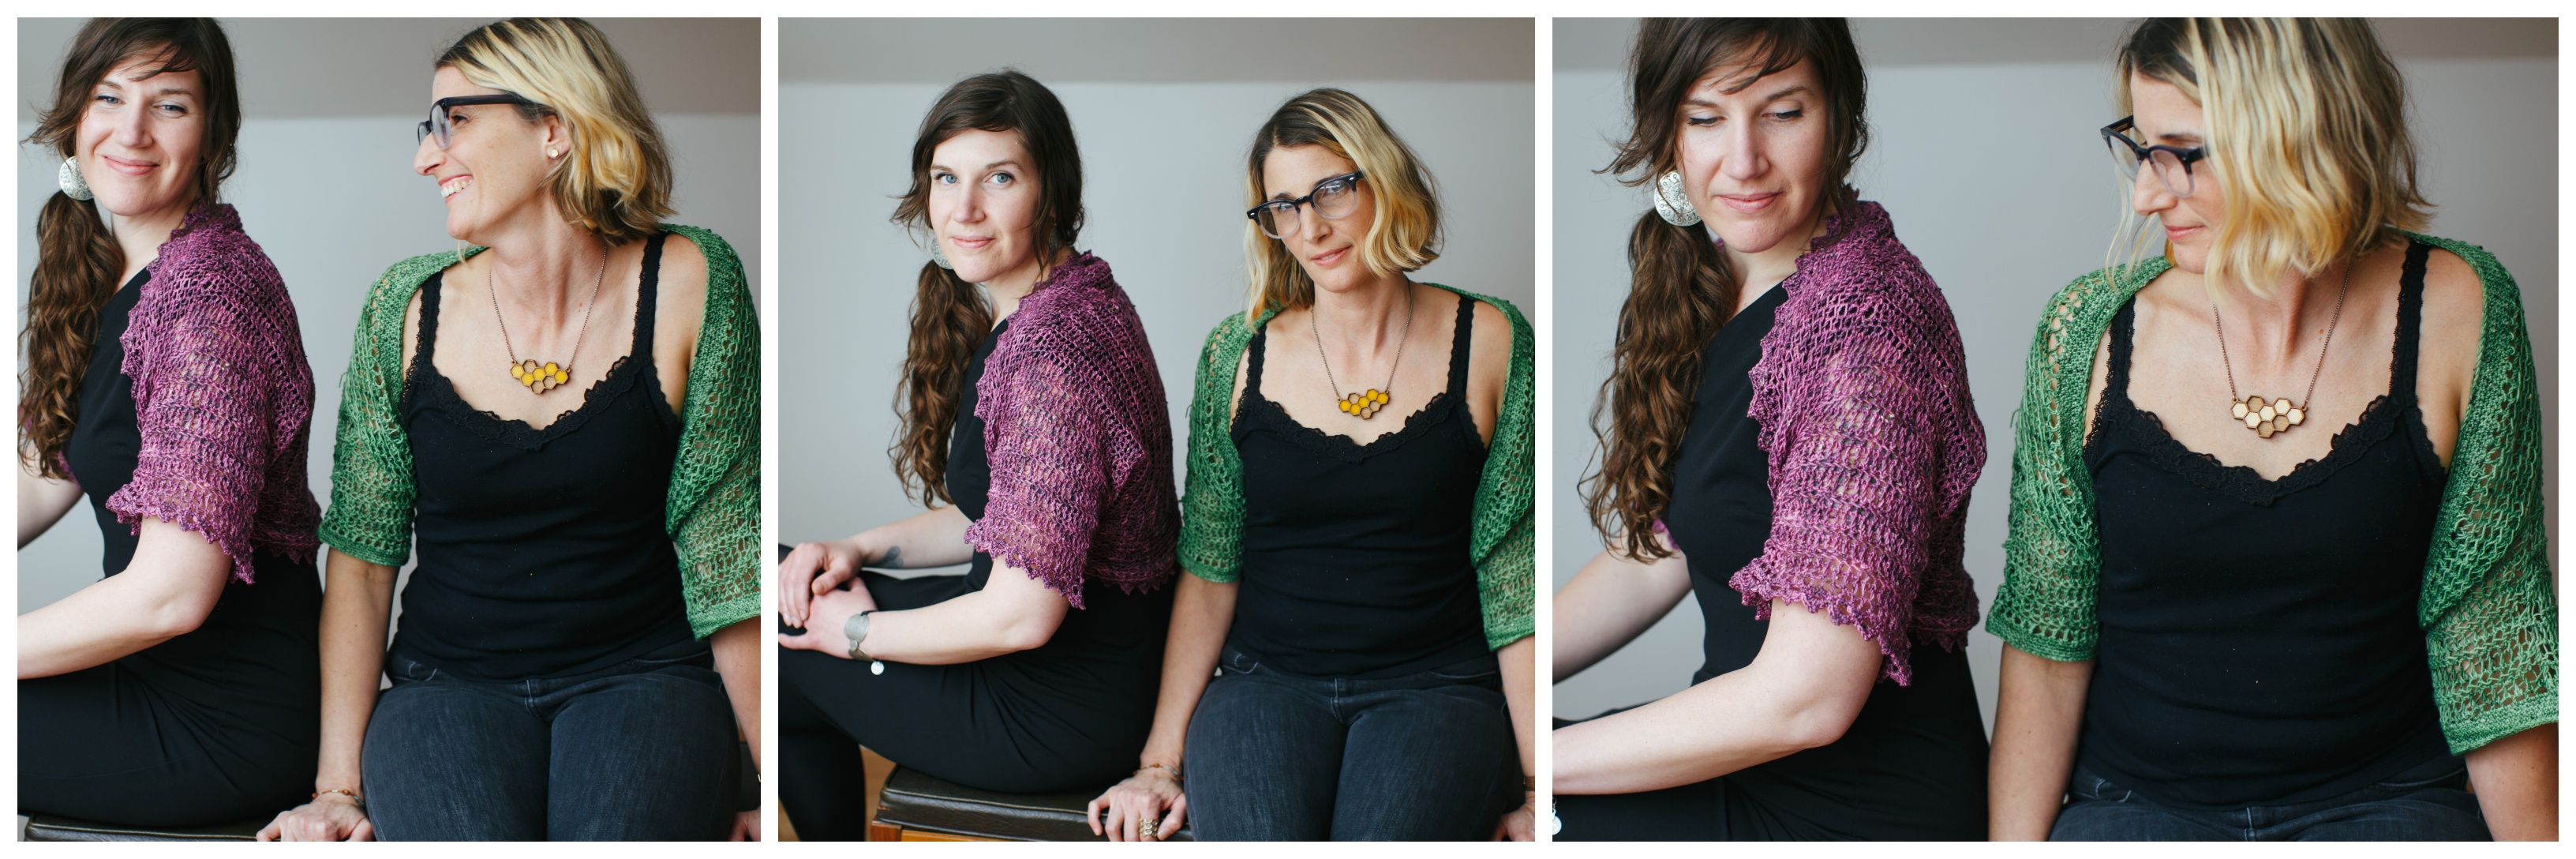
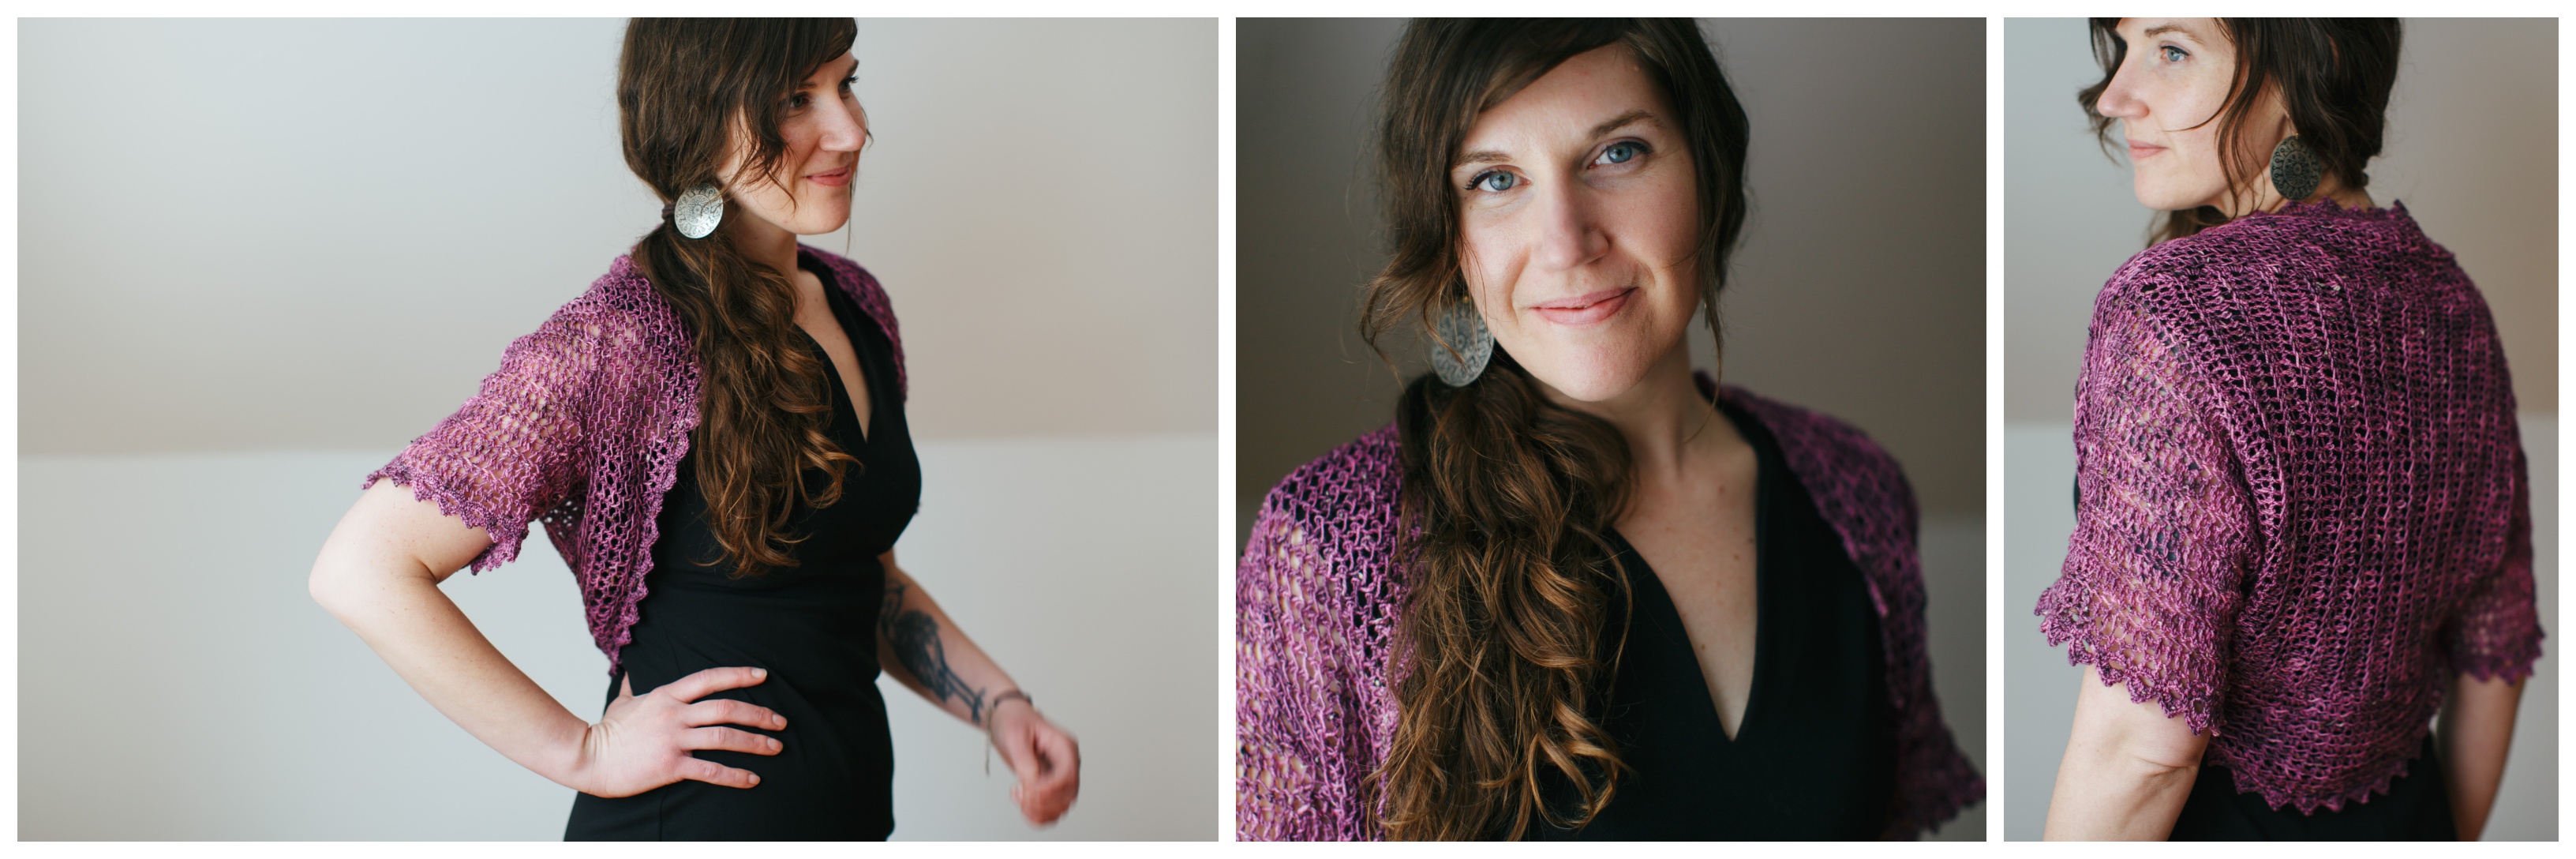
Bestie Shrugs
Shrugs are one of those delightful confections whose sum is greater than its parts. When you take a rectangle and add sleeves, you suddenly have an accessory that adds chic finish to your little black dress or takes your daytime top into evening-wear territory. Now you have two styles to choose from. One for you and one for your best friend! And the best part? Each shrug only uses one skein of fingering weight yarn. FINALLY a crochet garment that doesn’t break the bank!
Want the PDF to download for safekeeping?
It’s only $1.99 and you help support The Firefly Hook!
![]()

Want the Ravelry Download for $2.00?
![]() Find this pattern on Ravelry here and use the code TAKE3 at checkout for $3.00 off (Reg. price $5.00).
Find this pattern on Ravelry here and use the code TAKE3 at checkout for $3.00 off (Reg. price $5.00).
Need pattern support? Join our facebook community!
Leisure Arts books by Abbey Swanson of The Firefly Hook. Your purchase helps support this site!
Click here to shop.

Materials
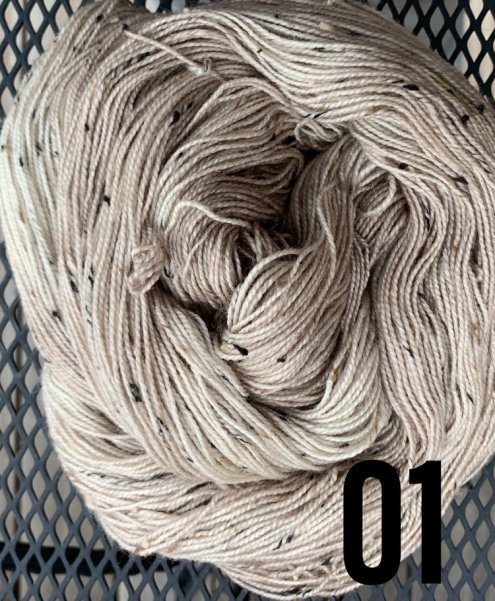
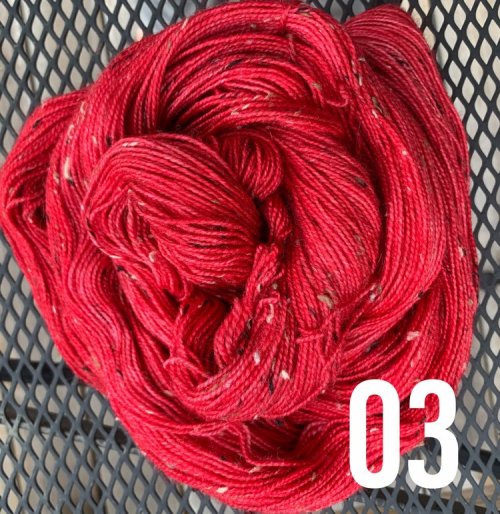
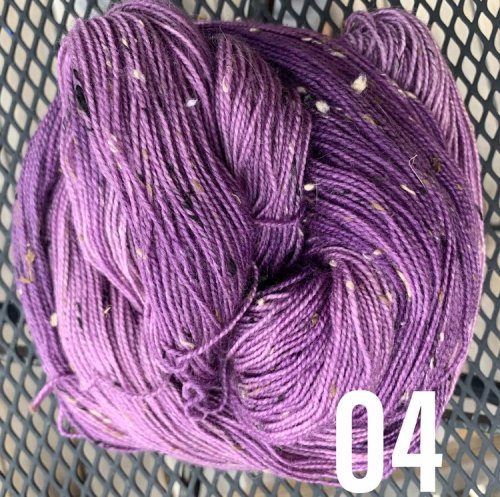
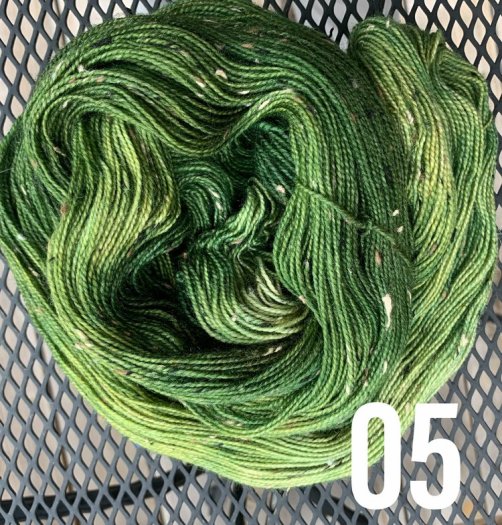
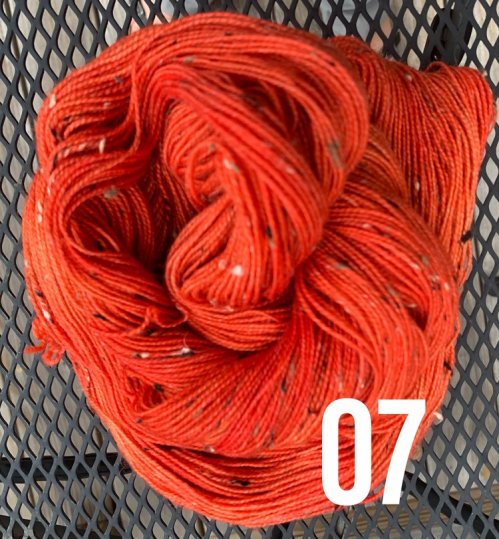
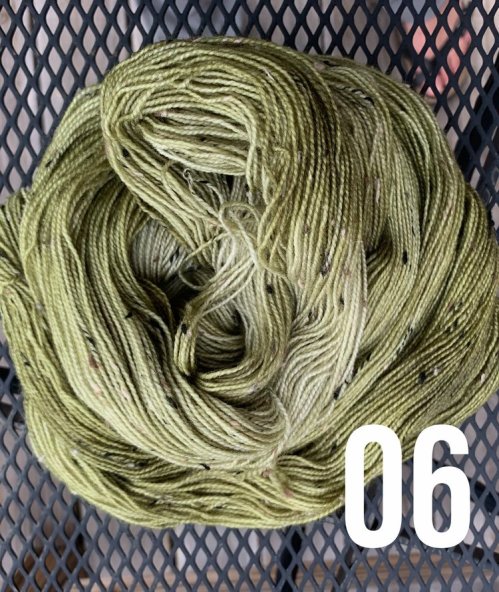
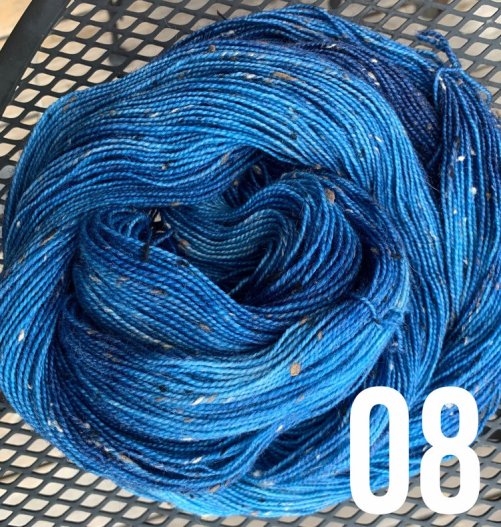
Yarn: Running on Yarn Tweed Collection fingering weight yarn: 438 yd/ 100g per skein 85% Bluefaced Leicester, 15% Donegal nep (Polymide). Choose one skein per shrug.
See current color choices at runningonyarn.com.
Hook: 4.0 mm and 8.0 mm
My favorite hooks:

Shop here.
Before we get to the pattern, let’s take a moment to drool over all these color choices by Running On Yarn.
Click here (or on any photo below) to shop!

Pattern Info
Blocked Gauge of Base: 8 rows and 13 sts = 4 inches in stitch pattern
Sizes: X-Small, Small, Medium, Large, X-Large, (Pattern written for X-Small with other sizes in parentheses.)
Measurements for each size:
X-Small: Bust 28″- 30″; Cross-back 14″ – 14.5″
Small: Bust 32″ – 34″; Cross-back 14.5″ – 15″
Medium: Bust 36″ – 38″; Cross-back 16″ – 16.5″
Large: Bust 40″ – 42″; Cross-back 17″ – 17.5″
X-Large: Bust 44″ – 46″; Cross-back 17.5″
Notes
Shrug is worked in a smaller rectangle then blocked to almost double the length. From this base the armholes are sewn, then the collar and edging are added. The base is created with BL sc sts, making an elastic fabric, able to stretch then be blocked to the desired size.
Abbreviations
ch chain
rep repeat
sc single crochet
st stitch
BL back loop
Special Stitches
Picot – Ch 3, sl st in base of st.
Pattern
(Both shrugs)
Base
With the 8 mm hook, make a chain 12” (13”, 14”, 15”, 16”) in length.
Row 1: Sc in second ch from hook and in each ch across. (Note: count your sts, st count stays the same throughout.)
Row 2: Ch 1, turn, sc in BL of each st across.
Rows 3 – end: Rep row 2 until base measures 10” wide x 12” long (11”x13”, 12”x14”, 13”x15”, 14”x16”) unstretched.
Block:
Block base by spritzing with water and pinning so base measures 10”x24” (11”x26”, 12”x28”, 13”x30”, 14”x32”) then leave pinned until dry. Stretch base so rows are lengthened (not stretched in the direction the stitches were made).
Try Amazon Prime 30-Day Free Trial

Arm Holes
Fold base in half lengthwise and sew from the corner in 4” (or desired amount).
Collar
Attach yarn to largest opening and sc evenly around. (be sure stitch count is a multiple of 5)
Continue working in sc rnds working in the back loop only until collar measures 4”
Do not finish off.
Edging
(Purple shrug only)
Collar Edging
Switch to 4.0 mm hook
Rnd 1: Work 2 sc in each st working under both loops.
Rnd 2: [Sc in next 2 sts, ch 3, sk 3 sts] rep around, sc in first sc to connect rnd.
Rnd 3: Sc in each sc, work (3 dc, picot, 3 dc) in each ch-3 sp, sl st in first st to connect rnd. Finish off.
Arm Hole Edging
With 4.0 mm hook
Follow instructions for Collar Edging and work edging around each arm hole. Finish off.
Block as needed.

Alternate Collar and Arm Hole Edging (Green shrug)
Follow rnd 1 of Collar Edging.
Rnds 2 – end: Sc in each st around until Edging measures 1” then work 1 rnd in sl st.
Block as needed.

Need a place to sell PDFs? Try SendOwl! More info here.
Hope you liked the pattern! Comment below with any questions. I added some YouTube videos from my channel below. Enjoy!
Crochet often. Create always!
Xoxo,
Abbey
Need pattern support? Join our facebook community!

This was so fun to make! An interesting way to work that I’ve never seen before.
LikeLike
Thanks so much for working this up!
LikeLike
It says there are six sizes but I’m only seeing instructions/measurements for five within the pattern (Base and Block parts).
LikeLike
Hi Michelle!
Thank you! It’s just supposed to be 5 sizes. I deleted the xxl. If I have people who want to test more sizes, I can add them. But I’ll stick to those 5 for now. Thanks for catching that! Are you going to be able to work one up?
LikeLike
Just seeing this! I am working on it again now after starting it that day. 🙂
LikeLike
What size hook did you use for the collar section? The stitches look much tighter than for the 8mm for Base. Is it 4mm like for Edging?
LikeLike
Upon closer inspection, I think you used the 8mm hook for Collar (also why Collar Edging says to switch to 4mm).
I think that the tidbit about making sure the stitch count is divisible by 5 needs to be at the end or R1 of Collar Edging to make sure that it is taken to account when repeating those instructions for Arm Hole Edging.
LikeLike
So sorry to leave you hanging… Crazy week here! 🙂 yes you are correct it’s the 8mm but it isn’t as blocked out as the main section. Ans thank you so much for your notes here and on other comments – I’ll get those changes made (HOPEFULLY before I head out of town!)
LikeLike
You might also write at the start or Collar and Arm Hole Edging to join the yarn near the armhole seam.
LikeLike
Thanks for testing this Michelle! It’s so fun to see it worked up by someone else. I still need to get the edits in and add it to Rav – hoping to do that today or tomorrow!
Abbey
LikeLike
Just reading and not working the pattern, I had a couple thoughts.
First, having approximate bust sizes along with the XS, S, etc would be useful.
Second, I would suggest renaming the “cuff” as that is typically viewed as around the bottom edge of a sleeve. Maybe call it edging? And use just trim instead of cuff trim?
Third, I would change rnd 3 of the trim to make it more cohesive with the rest of the instructions, as follows:
Rnd 3: Sc in each sc, work (3 dc, picot, 3 dc) in each ch-3 sp, sl st in first st to connect rnd. Finish off.
These are merely my suggestions and I will not be offended if you choose to ignore them ❤️
(I’ll see if I have the time to actually test it for you, but thought a quick proofread could also be helpful)
LikeLike
Thank you so much for your thoughts on this! I appreciate it so much. For the sizes, I depended more on the cross-back measurement. But should I just include the bust size as reference?
What you are saying about the cuff/trim etc makes more sense than how I wrote it. I just can’t figure out what to call that section that goes around the neck, along side the body and around the back.
And I like how you rewrote rnd 3 of the trim.
Again, THANK YOU so much for your help!
Warmly,
Abbey
LikeLike