

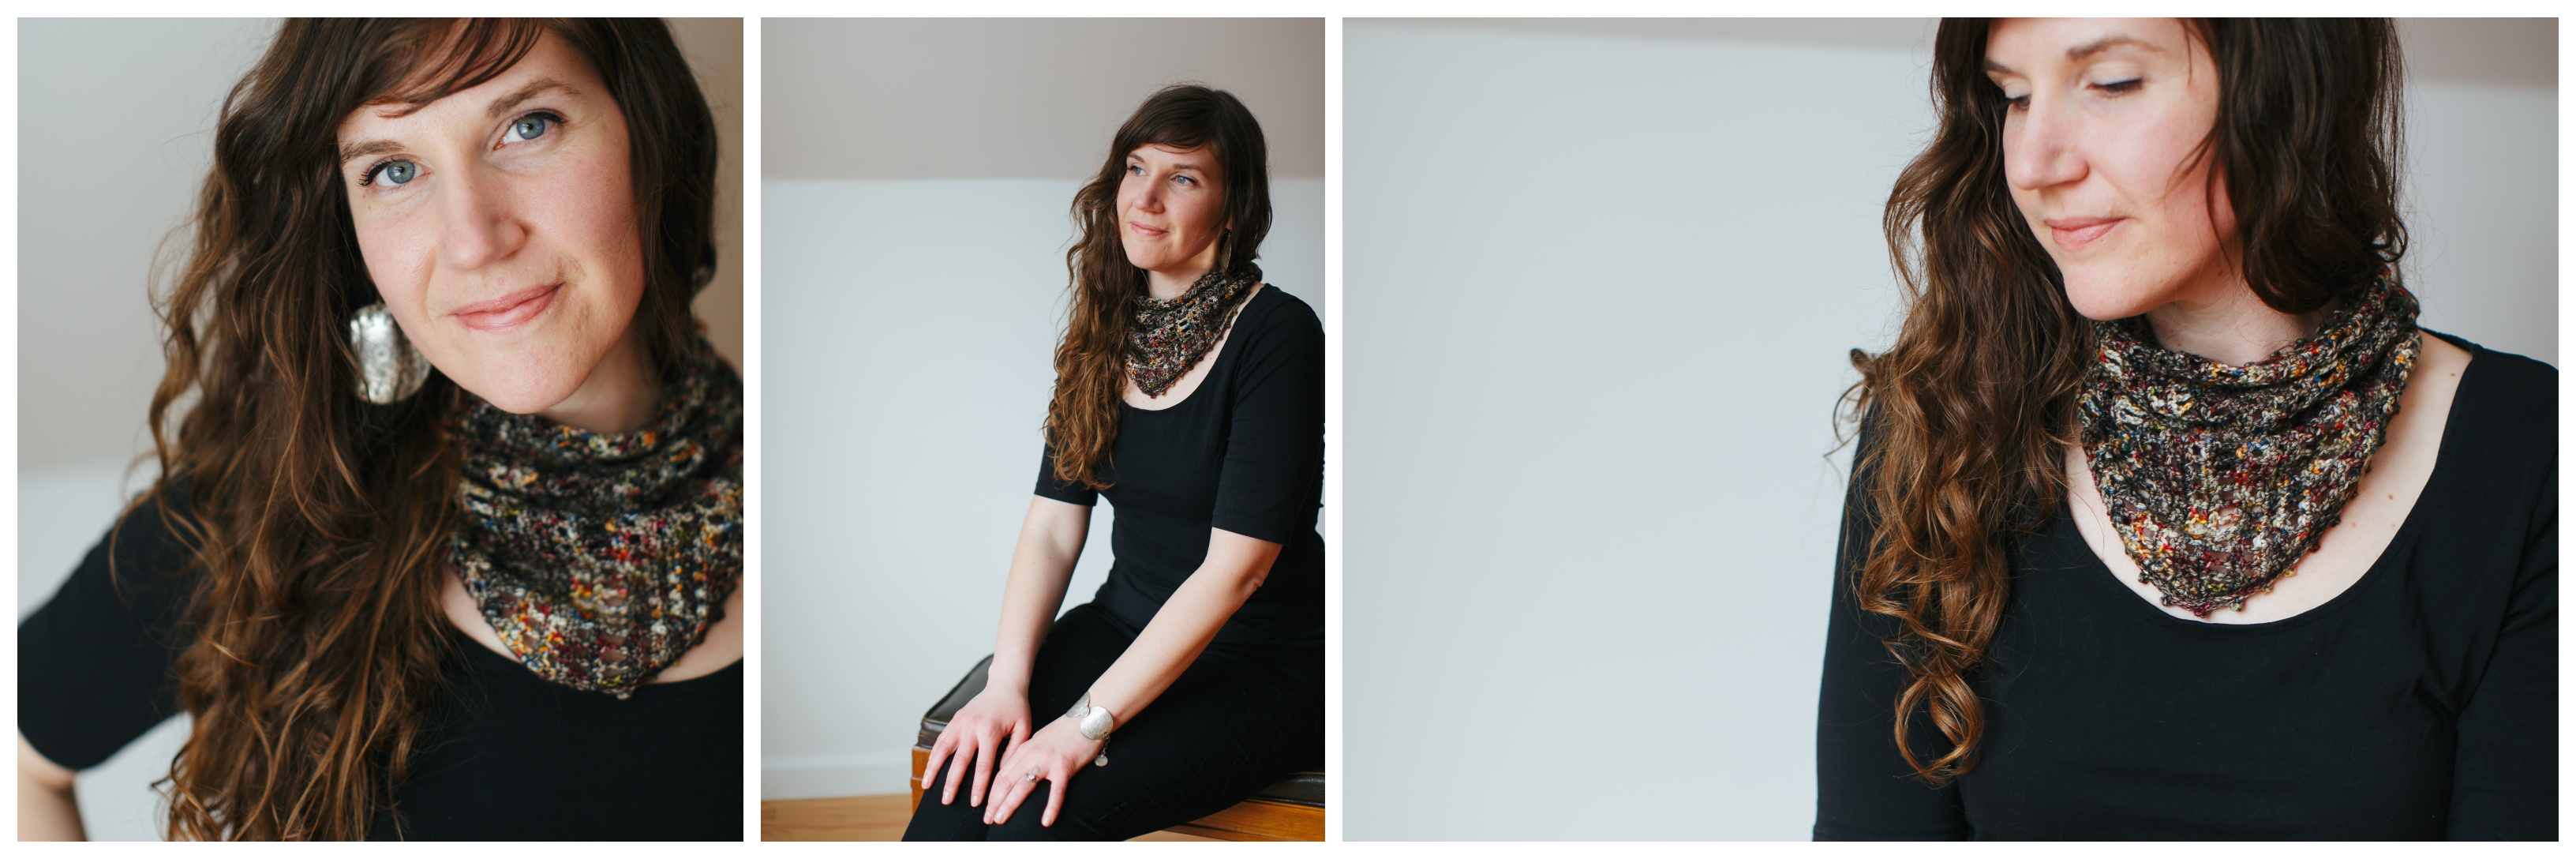

Festival Bandanas
You know who it is. The one who gets you. You go together like peanut butter and jelly, like peaches and cream, like popcorn at the movies. These festival bandanas are a celebration of the mosaic of color and creativity that is friendship. No two are alike! Now you can create one of a kind accessories to add color and pop to any outfit. Get ready with your bestie for festival season with these one of a kind bandanas!
Want the PDF to download for safekeeping?
It’s only $1.99 and you help support The Firefly Hook!
![]()

Want the Ravelry Download for $2.00?
![]() Find this pattern on Ravelry here and use the code TAKE3 at checkout for $3.00 off (Reg. price $5.00).
Find this pattern on Ravelry here and use the code TAKE3 at checkout for $3.00 off (Reg. price $5.00).
Need pattern support? Join our facebook community!
Leisure Arts books by Abbey Swanson of The Firefly Hook. Your purchase helps support this site!
Click here to shop.

Materials
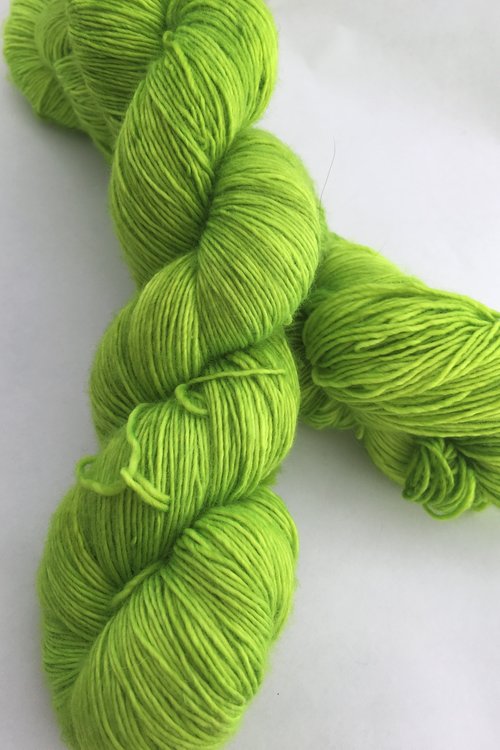
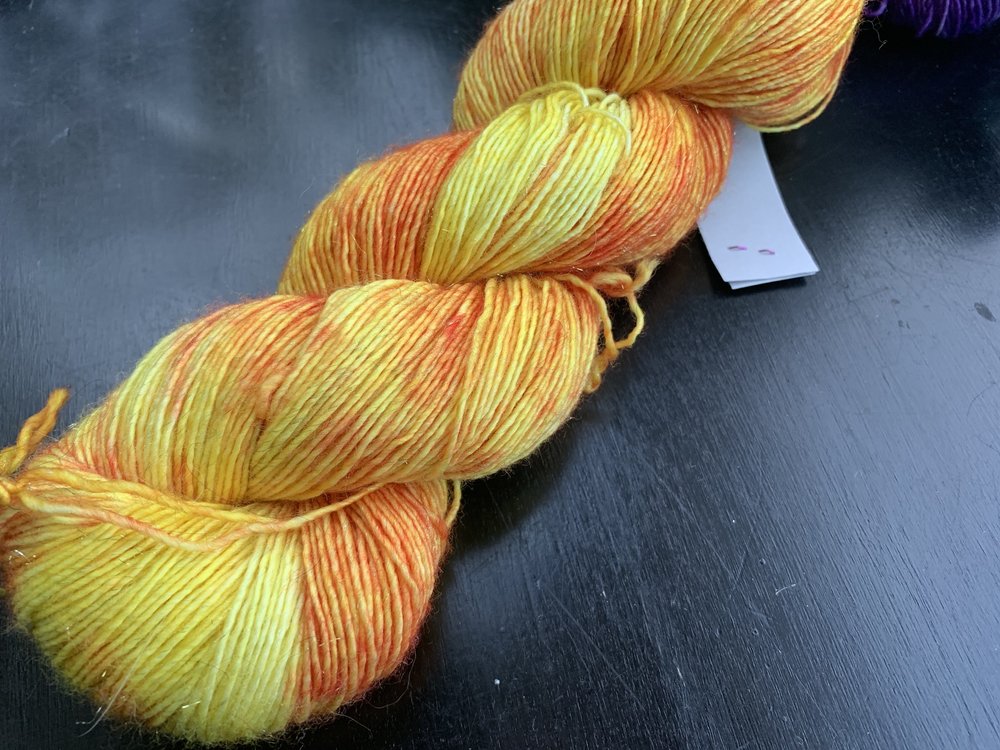
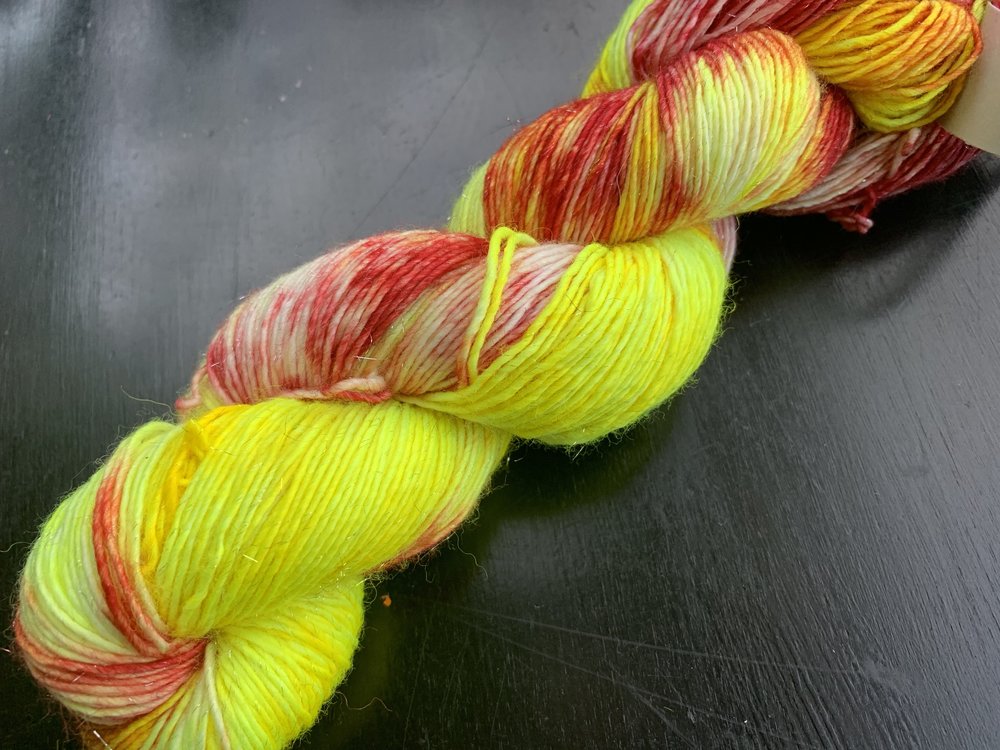
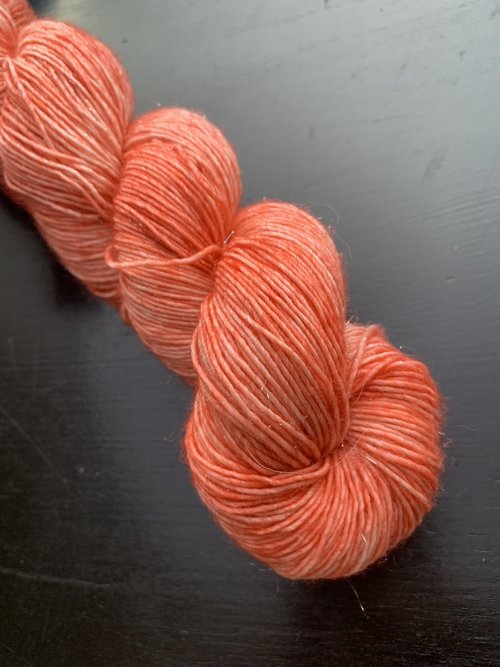
Yarn: Running on Yarn Solid Singles or Sparkly Singles fingering weight yarn (100% superwash Merino 400 yd/ 100g per skein). Choose one skein per bandana.
See current color choices at runningonyarn.com.
Hook: 3.75 mm (or size needed to obtain gauge)
My favorite hooks:

Shop here.
Before we get to the pattern, let’s take a moment to drool over all these color choices by Running On Yarn.
Click here to shop!


Pattern Info
Gauge: 15 rows (Measured over rows 2 – 16) and 23 sts = 4 inches in stitch pattern
Dimensions: 21” circ, 14” at the longest including fringe.
Notes
Cowl is worked in rows, first increases then decreases, then the first and last rows are sewn together to create a tube. One side of the cowl’s rows are straight (no increases or decreases) and the other side has the increases and decreases to create the point.
Abbreviations
ch(s) chain(s)
dc double crochet
hdc half double crochet
rep repeat
sc single crochet
sc2tog single crochet 2 together
sk skip
st stitch
tr treble crochet
Try Amazon Prime 30-Day Free Trial

Special Stitches
Sc2tog – Insert hook into next stitch and draw up a loop. Insert hook into next stitch and draw up a loop. Yarn over, draw through all 3 loops on hook.
Picot – Ch 3, sl st in base of st.
Pattern (test mode)
Both Bandanas
(Increase rows)
Ch 28.
Row 1: 2 sc in second ch from hook, sc in each ch across. (28 sc)
Row 2: Ch 2 (counts as 1 hdc), turn, [hdc in next st, ch1, sk 1 st] rep across, 2 hdc last st. (29 sts/chs)
Row 3: Ch 1, turn, 2 sc in first st, sc in each st/ch across. (30 sts)
Row 4: Ch 3 (counts as 1 dc), turn, [dc in next st, ch 1, sk 1 st] rep across, 2 dc in last st. (31 sts/chs)
Row 5: Rep row 3. (32 sc)
Row 6: Ch 4 (counts as 1 tr), turn, [tr in next st, ch 1, sk 1 st] rep across, 2 tr in last st. (33 sts/chs)
Row 7: Rep row 3. (34 sc)
Row 8: Rep row 4. (35 sts/chs)
Row 9: Rep row 3. (36 sc)
Rows 10 – 38: Rep rows 2 – 9 four times ending last rep after rnd 6. Each row adds 1 stitch to total count: Row 38 = 65 sts.
(Decrease rows)
Row 39: Ch 1, turn, sc2tog over first 2 sts, sc in each st/ch across. (64 sts)
Row 40: Ch 3 (counts as 1 dc), turn, [dc in next st, ch 1, sk 1 st] rep across to last 3 sts, dc in next st, sk 1 st, dc in last st. (63 sts/chs)
Row 41: Rep row 39. (62 sts)
Row 42: Ch 2 (counts as 1 hdc), turn, [hdc in next st, ch 1, sk 1 st] rep across, to last 3 sts, hdc in next st, sk 1 st, hdc in last st. (61 sts/chs)
Row 43: Rep row 39. (60 sts)
Row 44: Rep row 40. (59 sts/chs)
Row 45: Rep row 39. (58 sts)
Row 46: Ch 4 (counts as 1 tr), turn, [tr in next st, ch 1, sk 1 st] rep across, to last 3 sts, tr in next st, sk 1 st, tr in last st. (57 sts/chs)
Rows 47 – 75: Rep rnds 39 – 46 four times ending last rep after rnd 43. (Note: each row decreases by one; Row 75 = 28 sts.)
Do not finish off.
Slip stitch rows 1 and 75 together. Finish off.
Fringe Bandana:
Cut 6” strands of yarn. Attach strands in sets of 5 to row ends as follows: 1 set on hdc, 2 sets on dc, 3 sets on tr. For the second row of fringe: Working 5 rows above the first fringe, add 1 set of 5 strands around each hdc, dc and tr stitch.
Bandana with edging:
Attach yarn to top of cowl, working in row ends, sl st evenly around working a picot every 4th st. Attach yarn to bottom of cowl and repeat.

Need a place to sell PDFs? Try SendOwl! More info here.
Hope you liked the pattern! Comment below with any questions. I added some YouTube videos from my channel below. Enjoy!
Crochet often. Create always!
Xoxo,
Abbey
Need pattern support? Join our facebook community!

Thankss for sharing this
LikeLike
And she’s done as per the corrections ~
LikeLike
I made a Ravelry page and wanted to post my final photo here! This will also work great as a kerchief on my head
LikeLike
When slst the edges together, I didn’t come out even, but thats because Row 1 only has 27 sts available to slst into and Row 75 is 28 sts! haha more challenges
LikeLike
Oh boo… I have 28 sts for row 1.
LikeLike
Love/hate relationship with this one. On the increase portion, I kept having “count” issues; I’d have the right number on one row and be off the next. After 3 froggings and trying to count “spaces” for my stitches before working them, I figured out that SC rows started in the same st as the ch1 and the HDC, DC and Tr started in the 2nd st. Revelation!!! Whipped the first half of that baby off licketey split! Then the decreases… Once you corrected that, my only problem was my muscle memory making that extra SC between the last 2 sts while my brain was saying HDC, HDC, etc.
LikeLike
Phew!! So sorry to put you through the ringer on this one! 💕💕 I very much appreciate your help!
LikeLike
I am finished. I think the pattern is correct now.
LikeLike
Looking awesome Carla! Thanks so much for testing!
LikeLike
My main piece is done, I think I will do the picot edging to finish it off!
LikeLike
Thanks so much for testing! I really appreciate your help on this. And thanks for not giving up on me when the math was all wonky 🙂
LikeLike
I always love a good challenge Abbey! but I did have trouble understanding what rows where used for the gauge: “2 tr, 4 dc, 2 hdc, 7 sc”. Would it be easier to say gauge measured over Rows 2-16. I spent way too much time on that single sentence lol, since Rows 1-15 didn’t meet your st criteria
LikeLike
Ah! Thank you! I was trying to figure out how to say that since I couldnt simply state how many rows (because it depends which rows you measure!) 💕💕 I’ll change that.
LikeLike
I really like yours.
LikeLike
I agree with you about measuring the gauge. My bandana is bigger than it should be but my yarn was a little thicker than the pattern called for.
LikeLike
Uh oh, I got to row 38 yesterday and then noticed the dec count seemed off, so I took the rest of the day off and just came back to write you, however I see there were a lot of notes made yesterday and the correction to the dec was made. Unfortunately I had already made the bandana as written to that point and have increases on both sides, I guess I missed the note that increases are only on one side. A frogging I will go… I’ll try to catch back up quickly!
LikeLike
Oh Nooooo! Ugh – so sorry! I seriously appreciate you testing this! And don’t stress about the deadline… I’m def. extending it for this test.
Thank you again!
Abbey
LikeLike
I’m tickled to be testing it and can’t wait for it to be done and then the weather to cool down so I can wear it.
LikeLike
Oh I’m so happy to hear that! I can’t wait to see how it turns out!
LikeLike
I’m about to start the decrease section & (apparently) just really read the instructions for Row 3! The way it is written sounds like we would do 2SC in every stitch/chain across, but it should be 2SC in first stitch, 1SC in each stitch/chain across.
LikeLike
Or is it supposed to be 2SC in each chain space?? If so, I’ve done it all wrong. 😬
LikeLike
Hey! Thanks for testing! I fixed it so it’s correct. In the notes it says all the inc/dec are on one side. So if that’s how you did it – you are good to go! So yes – it’s 2 sc in the first then 1 sc across. Thanks for catching that! We had a lot of edits on this one yesterday – phew! But I think we are almost there:)
Thanks again!
Abbey
LikeLike
Alright testing friends! I just worked out the math and I think it’s correct (or very close). And I made the adjustments for the inc/dec to be on one side. Again, SO SORRY for the mistake.
LikeLike
On the decrease rows, 40 and 42, I don’t understand how they decrease since you are actually completing a decrease stitch. There are no single crochet 2 together.
LikeLike
The other rows (besides sc rows) decrease by skipping a stitch. Is that what you mean?
LikeLike
I have to start over. I was just reading ahead. I didn’t realize that you skipped an extra stitch.
LikeLike
Not and extra stitch, you just don’t make the chain between the stitches like before.
LikeLike
Sorry testers! I made a mistake! I wrote increases on both sides (instead of just one). The sc rows start with an increase and the other rows end with one. Sorry for the confusion! I appreciate you all:)
I fixed the notes so it’s more clear: Cowl is worked in rows, first increases then decreases, then the first and last rows are sewn together to create a tube. One side of the cowl’s rows are straight (no increases or decreases) and the other side has the increases and decreases to create the point.
LikeLike
Should I continue working or start over because of the increases. I sent you a picture on Messenger.
LikeLike
I think I have it fixed and I added a new note to the notes section. All the inc & dec should be on one side to create one pointed edge and one straight edge. So sorry for the confusion!
LikeLike
My bandana looks like it is increasing some on both sides. I started over and it still looks like increases on both sides. I don’t understand how it would not increase since you always do two stitches in the last stitch. I am not sure where to send the picture.
LikeLike
Gotcha! You are right. I’ll fix it quick…
LikeLike
On Row 38: I ended up with 65 sts, not 64 sts. Secondly Row 39 has One decrease, but the st count is 57?? I do not see dec in the abbreviations list either
LikeLike
Thanks so much for your feedback Stephanie! I appreciate it! Okay – row 38 – you may be correct about the count being 65. I’ll wait and see if anyone else chimes in while I rework the math. And big OOPS for row 39. I’ll fix the counts (as if row 38 as 64, then fix again if 65 is correct. I just don’t want to leave that BIG of a whoopsie haha). And I’ll add sc2tog to the abbreviations…
LikeLike
Do both sides of the bandanna increase or are all the increases on one side. I think I made a mistake and have an increase on the wrong side.
LikeLike
Just one side has the increase/decrease.
LikeLike
When I look at mine, all the sc inc’s are on one side, and the dc, hdc, and tr inc’s are on the opposite side, every single row ends with 2 sts in last st.
LikeLike
Oh good! That’s what I wanted to hear!
LikeLike
I think it would be helpful to add instructions on how to make a picot. I have to look it up every time.
LikeLike
Oh yes – I think it didn’t get copied over from the original. I’ll fix that!
LikeLike
Oh – it’s actually there under special sts
LikeLike
I didn’t see it, sorry.
LikeLike
No worries!
LikeLike
On row 2: I think it makes more sense to say to (Hdc2tog in next st, ch 1, sk 1 st) it seems like that is the order you are actually working in. It might just be me.
LikeLike
Hi Carla! Thanks so much for testing – you are on a roll!
Do you mean row 2 of the decrease rows?
LikeLike
The increase rounds or all the rows with the chains between stitches.
LikeLike
I gotcha! I revised it – let me know if I caught them all.
Thanks Carla!
LikeLike
Test
LikeLike
looks good!
LikeLike