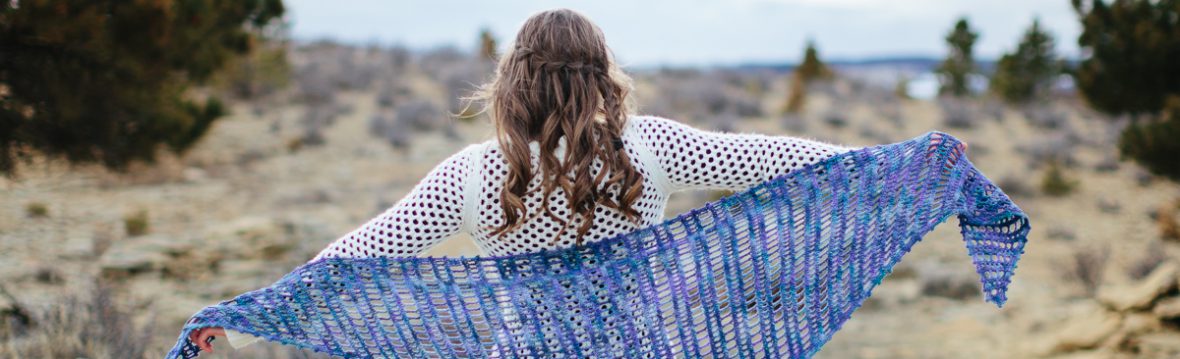
 Have you ever wanted to make crocheted socks?
Do you think it sounds scary?
I thought so too. This super easy method will knock your socks off… or on?… okay, I’ll stop.
First, you need a small foot to practice on. If you don’t have a small relative or little friend nearby, then your own foot will work just fine.
We are going to use bulky yarn and a larger hook. This will encourage you and help you feel confident so you can easily transition to making socks with sock yarn and a smaller hook. This method will work for any hook with any yarn.
Here’s what I used:
Size (K – 10 1/2) 6.5 mm hook
Yarn Bee’s Melody Bulky Yarn
My daughter Iva Grace as my foot model (2 years old).
*Abbreviations, tutorial links and pattern with no photos at the bottom of post*
Favorite or Queue on Ravelry here.
Step 1: First we need to determine how many stitches around our sock needs to be:


Step 2: Increase in the round to your number of chains.
My number was 17 chains:

Rnd 1: Sc in 2nd ch from hook and in next 2 ch, 3 sc in last ch, (working in bottom of ch) sc in next 2 ch, 3 sc in last ch. (11 sc)
Rnd 2: 2 sc in 1st sc from rnd 1, [sc in next st, 2 sc in next st] rep around. (17 sc)

Step 4: The Gusset (cue dramatic music). This method makes the gusset a breeze (cut dramatic music). Yes, that’s right. This is easy. Take a deep breath…


Step 5: The gusset is half done! Now we will work in the stitches and the sides of the rows to complete the other half.


Count and make sure you have 17 (or your own number) of sts around. Increase or decrease accordingly.
Step 6: Up the ankle we go! I hope the gusset didn’t give you any trouble. But it’s over now and we’re on to another easy part!


Finish off.
Step 7: Decide if you want an alternate ending to your socks!
For taller socks: repeat rnd 16 until desired height is achieved.
End with a special stitch for rnd 17 instead of a sl st.
Share your alternate ending in the comments below!


We made a pretty big decision recently at The Firefly Hook. We don’t want to have a website with ads to earn income from what we do. We want to create with you, help you learn something about crocheting, and get you excited about inspiring others!
So, how can you support us?
Share our free patterns, tutorials, and crochet tips with your friends!
Check out our Etsy, Ravelry, and Craftsy shops and purchase patterns from us. We have a coupon for our blog friends that you can use on Etsy and Ravelry for a 20% discount: BLOGFRIENDS2014.
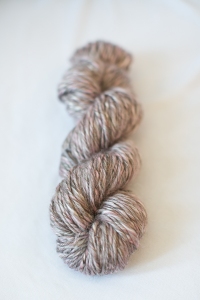
Did I mention I spin my own yarn? I offer free patterns with yarn purchase.
These lovelies are for sale in my Etsy shop. Click on any yarn photo for more information:


.
.
.
.
.
.
.
.
.
.
Abbreviations:
(click for tutorials)
rnd – round
ea – each
st – stitch
rem – remaining
sc2tog – single crochet two together
Slipper Socks Pattern:
6.5 mm hook
Bulky Yarn
(Make 2)
Ch 5.
Rnd 1: Sc in 2nd ch from hook and in next 2 ch, 3 sc in last ch, (working in bottom of ch) sc in next 2 ch, 3 sc in last ch. (11 sc)
Rnd 2: 2 sc in 1st sc from rnd 1, [sc in next st, 2 sc in next st] rep around. (17 sc)
Rnds 3 – 7: Sc BL only in ea st around. (17 sc BL only)
Row 8: Ch 1, turn, sc2tog, sc in next 5 sts, sc2tog. (7 sts)
Row 9: Ch 1, turn, sc2tog, sc in next 3 sts, sc2tog. (5 sts)
Row 10: Ch 1, turn, sc in ea st across, sc in the end of row 9, sl st in the end of row 8. (6 sc)
Row 11: Ch 1, turn, sk sl st, sc in ea sc across, sc in the ends rows 10, 9 and 8 (do not turn, rnd 12 begins in the next st). (9 sc)
Rnds 12 – 16: Sc BL only in ea st around. (17 sc BL only)
Rnd 17: Sl st BL only in ea st around. (17 sl st BL only)
Finish off.

I love it! but I REALLY wish you would clarify the heel gusset for a larger size…it needs to be deeper but I can’t figure out how to do it.
LikeLike
Hello!
I will try and help – what size hook and yarn are you using? And what is the stitch count around before you start the heel? I’ve worked this pattern myself and taught it as a class for many feet, yarn and hook sizes. I will do my best to help you figure it out in the comments (but it’s always easier to show in person!).
Warmly,
Abbey
LikeLike
Thank you so much for this lovely pattern! FINALLY, a tutorial for making socks that makes sense! You (and your cutie patootie sock model) have completely made my day!
LikeLike
I wish you could make a pattern for these in a women’s size 8….it gets pretty sketchy at the heel for me
LikeLike
I want a pair of those for ME! I have some lovely Pothies but would like just to be able to make some similar.
LikeLike
So cute! Thanks for sharing the pattern! And love the colours your yarn has! Especially the green one! Eyecandy! 🙂
LikeLike
Thank you! I hope you enjoy making some. I’m gong to teach a class with these in a few weeks so we will see how that goes. The green really pops in the photo, doesn’t it?
Thanks for stopping by!
Warmly,
Abbey
LikeLike